Enabling Google Authenticator two factor authentications with Connectwise, Labtech, ScreenConnect, and ITGlue
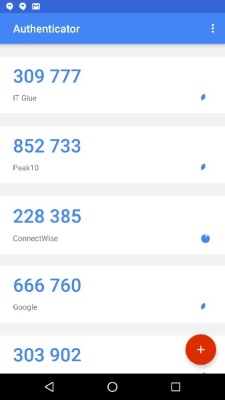
Google Authenticator generates 2-Step Verification codes on your phone. It can be linked to many websites and programs to provide 2 factor authentications.
The codes are consistently changing (on a timer), and stack up inside the app, so you can get to a code for each app you link.

ConnectWise
- System Members Click the individual member Scroll to the bottom Select Google Authenticator from drop down

- Click activate, and you will receive a QR code to use with the google Authenticator App on your phone

- On the phone of the user you are editing, open the google authenticator app, click the “plus sign” and select scan QR code
- This will add one line item to the list of apps inside the google authenticator app, that will provide a consistently changing code
- Enter the code displayed into the ConnectWise box
- Click save user in Connectwise
- Log the user in as normal
- During the login process you will see this screen, enter the code from your phone
Labtech
More here- Launch the LabTech Control Center.
- Install the Google Authenticator solution from the Solution Center.
- From the Help menu, click Plugin Manager to enable the Google Authenticator plugin.
- Restart the database agent and the Control Center. IMPORTANT: Restarting the database agent will immediately terminate any scripts that are currently running. Before restarting the database agent, ensure all scripts have completed. For more information, refer to Viewing Running Scripts.
- Navigate to the Dashboard > Config > Integration and then select the Google tab.
- Select the following checkbox(es) depending on the level of security you wish to enable:
- Enable Web Control Center Protection - This will enable Google Authenticator for specific users who log into the Web Control Center.
- Enable Control Center Protection - This will enable Google Authenticator for specific users who log into the Control Center.
- Select the checkbox(es) for the specific user names to enable Google Authenticator.
- NOTE: An email containing the URL to your QR Code and Manual Entry Code will be sent to the selected user name(s).
- Click Save, when finished.
Screen Connect
More hereEnable Two-Factor Authentication Field
- Log into Screen Connect portal as admin
- Go to the Appearance page. In the web resource string table, find the “SecurityPanel.PasswordQuestionVisible” key . Click "Edit" to open the Edit Resource panel. Click the "Custom" radio button, and enter true in the text area.
- Click "Save Resource" to save your settings.
Get a User identification key
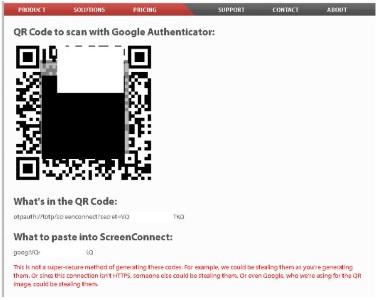
- Generate a Google Authenticator QR code from the ConnectWise Control site. Your user identification key will be listed on this page. It will be prefixed by "goog:."
- Example: goog:UUNTHYFZUDGGJYRQCD
- Scan the QR code into your Google Authenticator app, or enter your user identification key into the app.
- Add your user identification key to your selected users.
- Go to the Administration page and select the Security page. In the Internal section, click, "Show User Table."
- Next, click "Edit" beside a user. A new modal window will open
- In the "OTP (email, goog, yui, linotp)" field, paste your identification key.
- a. The goog:xxxxxxxxx key from above
- Save User
Notes: if you use the same goog:xxxx for each user, then they will all have the same 2FA code from google. If you generate different goog:xxxxx codes per user then they will be different
ITGlue
More hereEnable Multi-Factor Authentication on your IT Glue account
- Login as ITGlue admin
- Go to account tab
- Select Users tab on left hand side
- Select the pencil next to username to edit the user account
- Under Multi-Factor Authentication Settings, Enabled Multi-Factor Authentication
- User will get warning next time they login


